


Библиотека сайта rus-linux.net
| Purchase | Copyright © 2002 Paul Sheer. Click here for copying permissions. | Home |

|

| |
Next: 44. UNIX Security Up: rute Previous: 42. The LINUX Kernel Contents
Subsections
- 43.1 The X Protocol
- 43.2 Widget Libraries and Desktops
- 43.3 XFree86
- 43.4 The X Distribution
- 43.5 X Documentation
- 43.6 X Configuration
- 43.7 Visuals
- 43.8 The
startxandxinitCommands - 43.9 Login Screen
- 43.10 X Font Naming Conventions
- 43.11 Font Configuration
- 43.12 The Font Server
43. The X Window System
Before The X Window System (from now on called X), UNIX was terminal based and had no proper graphical environment, sometimes called a GUI. [Graphical User Interface.] X was designed to fulfill that need and to incorporate into graphics all the power of a networked computer.
X was developed in 1985 at the Massachusetts Institute of Technology by the X Consortium and is now owned by the Open Software Foundation (OSF). It comprises over 2 million lines of C code that run on every variant of UNIX.
You might imagine that allowing an application to put graphics on a screen involves nothing more than creating a user library that can perform various graphical functions like line drawing, font drawing, and so on. To understand why X is more than merely this, consider the example of character terminal applications: these are programs that run on a remote machine while displaying to a character terminal and receiving feedback (keystrokes) from that character terminal. There are two distinct entities at work--the application and the user's character terminal display; these two are connected by some kind of serial or network link. Now what if the character terminal could display windows and other graphics (in addition to text), while giving feedback to the application with a mouse (as well as a keyboard)? This is what X achieves.
43.1 The X Protocol
X is a protocol of commands that are sent and received between an application and a special graphical terminal called an X Server (from now on called the server). [The word ``server'' is confusing, because there are lots of X servers for each client machine, and the user sits on the server side. This is in the opposite sense to what we usually mean by a server.] How the server actually draws graphics on the hardware is irrelevant to the developer; all the application needs to know is that if it sends a particular sequence of bytes down the TCP/IP link, the server will interpret them to mean that a line, circle, font, box, or other graphics entity should be drawn on its screen. In the other direction, the application needs to know that particular sequences of bytes mean that a keyboard key was pressed or that a mouse has moved. This TCP communication is called the X protocol.
When you are using X, you will probably not be aware that this interaction is happening. The server and the application might very well be on the same machine. The real power of X is evident when they are not on the same machine. Consider, for example, that 20 users can be logged in to a single machine and be running different programs that are displayed on 20 different remote X servers. It is as though a single machine was given multiple screens and keyboards. It is for this reason that X is called a network transparent windowing system.
The developer of a graphical application can then dispense with having to know anything about the graphics hardware itself (consider DOS applications where each had to build in support for many different graphics cards), and that developer can also dispense with having to know what machine the graphics will be displayed on.
The precise program that performs this miracle is
/usr/X11/bin/X. A
typical sequence of events to get a graphical program to run is as follows. (This
is an illustration. In practice, numerous utilities perform these functions
in a more generalized and user-friendly way.)
- The program
/usr/X11R6/bin/Xis started and run in the background. X will detect through configuration files (/etc/XF86Configor/etc/X11/XF86Configon LINUX), and possibly through hardware autodetection, what graphics hardware (like a graphics add-on card) is available. It then initializes that hardware into graphics mode. - It then opens a socket connection to listen for incoming requests on a specific port (usually TCP port 6000), being ready to interpret any connection as a stream of graphics commands.
- An application is started on the local machine or on a remote machine. All X programs have a configuration option by which you can specify (with an IP address or host name) where you would like the program to connect, that is, on which server you would like the resulting output to display.
- The application opens a socket connection to the specified server over the network. This is the most frequent source of errors. Applications fail to connect to a server because the server is not running, because the server was specified incorrectly, or because the server refuses a connection from an untrusted host.
- The application begins sending X protocol requests, waiting for them to be processed, and then receiving and processing the resulting X protocol responses. From the user's point of view, the application now appears to be ``running'' on the server's display.
Communication between the application and the server is somewhat more complex than the mere drawing of lines and rectangles and reporting of mouse and key events. The server must be able to handle multiple applications connecting from multiple machines, and these applications may interact with each other (think of cut and paste operations between applications that are actually running on different machines.) Some examples of the fundamental X Protocol requests that an application can make to a server are the following:
- ``Create Window''
- A window is a logical rectangle on the screen, owned by particular application, into which graphics can be drawn.
- ``List Fonts''
- To list fonts available to the application.
- ``Allocate Color''
- Will define a color of the specified name or RGB value for later use.
- ``Create Graphics Context''
- A Graphics Context is a definition of how graphics are to be drawn within a window--for example, the default background color, line style, clipping, and font.
- ``Get Selection Owner''
- Find which window (possibly belonging to another application) owns the selection (i.e., a ``cut'' of text).
/usr/include/X11/Xproto.h contains the full list of X protocol requests
and events.
The programmer of an X application need not be directly
concerned with these requests. A high-level library handles the
details of the server interaction. This library is called the
X Library,
/usr/X11R6/lib/libX11.so.6.
One of the limitations of such a protocol is that developers are restricted to the set of commands that have been defined. X overcame this problem by making the protocol extensible [Being able to add extensions and enhancements without complicating or breaking compatibility.] from the start. These days there are extensions to X to allow, for example, the display of 3D graphics on the server, the interpretation of PostScript commands, and many other capabilities that improve aesthetic appeal and performance. Each extension comes with a new group of X protocol requests and events, as well as a programmers' library interface.
An example of a real X program follows. This is about the
simplest an X program is ever going to get. The program displays
a small XPM image file in a window and waits for a
key press or mouse click
before exiting. You can compile it with
gcc -o splash splash.c -lX11 -L/usr/X11R6/lib. (You can see
right away why there are few applications written directly in X.)
Notice that all X library functions
are prefixed by an
X.
5 10 15 20 25 30 35 40 45 50 55 60 65 70 75 80 85 90 95 100 105 110 115 120 125 130 135 140 145 150 155 160 165 170 175 180 185 190 195 200 205 210 215 |
/* splash.c - display an image */ #include <stdlib.h>#include <stdio.h>#include <string.h> #include <X11/Xlib.h> /* XPM */static char *graham_splash[] = {/* columns rows colors chars-per-pixel */"28 32 16 1"," c #34262e", ". c #4c3236", "X c #673a39", "o c #543b44","O c #724e4e", "+ c #6a5459", "@ c #6c463c", "# c #92706c","$ c #92685f", "% c #987e84", "& c #aa857b", "n c #b2938f","= c #bca39b", "- c #a89391", "; c #c4a49e", ": c #c4a8a4",/* pixels */ "--%#%%nnnn#-nnnnnn=====;;=;:", "--------n-nnnnnn=n==;==;=:;:","----n--n--n-n-n-nn===:::::::", "-----&------nn-n=n====::::::","----------------n===;=::::::", "----%&-%--%##%---n===:::::::","------%#%+++o+++----=:::::::", "--#-%%#+++oo. oo+#--=:::::::","-%%%%++++o.. .++&-==:::::", "---%#+#+++o. oo+&n=::::","--%###+$+++Oo. o+#-:=::", "-&%########++Oo @$-==:","####$$$+###$++OX .O+&==", "&##$O+OXo+++$#+Oo. ..O&&-","&##+OX..... .oOO@@... o@+&&", "&###$Oo.o++ ..oX@oo@O$&-","n###$$$$O$o ...X.. .XXX@$$$&", "nnn##$$#$OO. .XX+@ .XXX@$$#&","nnn&&%####$OX.X$$@. XX$$$$&", "nnnnn&&###$$$OX$$X..XXX@O$&n","nnnnnn&&%###$$$$@XXXXX@O$&&n", ";n=;nnnn&&&#$$$$$@@@@@@O$&n;",";n;=nn;nnnn#&$$$@X@O$@@$$&n;", "=n=;;;n;;nn&&&$$$$OO$$$$$&;;","n;=n;;=nn&n&&&&&&$$$$$##&&n;", "n;=;;;;;;;;&&&n&&&&&&&&#&n=;",";n;n;;=n;&;&;&n&&&&&&&#nn;;;", "n;=;;;;;;;;n;&&n&&&n&nnnn;;;","n=;;:;;=;;nn;&n;&n&nnnnnnn=;", "nn;;;;;;;;;;;;;;n&nnnnnn===;","=nn;;:;n;;;;&&&&n&&nnnnnn;=;", "n====;;;;&&&&&&&nnnnnnnnnn;;"}; int main (int argc, char **argv){ int i, j, x, y, width, height, n_colors; XSetWindowAttributes xswa; XGCValues gcv; Display *display; char *display_name = 0; int depth = 0; Visual *visual; Window window; Pixmap pixmap; XImage *image; Colormap colormap; GC gc; int bytes_per_pixel; unsigned long colors[256]; unsigned char **p, *q; for (i = 1; i < argc - 1; i++) if (argv[i]) if (!strcmp (argv[i], "-display")) display_name = argv[i + 1]; display = XOpenDisplay (display_name); if (!display) { printf ("splash: cannot open display\n"); exit (1); } depth = DefaultDepth (display, DefaultScreen (display)); visual = DefaultVisual (display, DefaultScreen (display)); p = (unsigned char **) graham_splash; q = p[0]; width = atoi ((const char *) q); q = (unsigned char *) strchr (q, ' '); height = atoi ((const char *) ++q); q = (unsigned char *) strchr (q, ' '); n_colors = atoi ((const char *) ++q); colormap = DefaultColormap (display, DefaultScreen (display)); pixmap = XCreatePixmap (display, DefaultRootWindow (display), width, height, depth); gc = XCreateGC (display, pixmap, 0, &gcv); image = XCreateImage (display, visual, depth, ZPixmap, 0, 0, width, height, 8, 0); image->data = (char *) malloc (image->bytes_per_line * height + 16); /* create color palette */ for (p = p + 1, i = 0; i < n_colors; p++, i++) { XColor c, c1; unsigned char *x; x = *p + 4; if (*x == '#') { unsigned char *h = (unsigned char *) "0123456789abcdef"; x++; c.red = ((unsigned long) strchr (h, *x++) - (unsigned long) h) << 12; c.red |= ((unsigned long) strchr (h, *x++) - (unsigned long) h) << 8; c.green = ((unsigned long) strchr (h, *x++) - (unsigned long) h) << 12; c.green |= ((unsigned long) strchr (h, *x++) - (unsigned long) h) << 8; c.blue = ((unsigned long) strchr (h, *x++) - (unsigned long) h) << 12; c.blue |= ((unsigned long) strchr (h, *x++) - (unsigned long) h) << 8; if (!XAllocColor (display, colormap, &c)) printf ("splash: could not allocate color cell\n"); } else { if (!XAllocNamedColor (display, colormap, (char *) x, &c, &c1)) printf ("splash: could not allocate color cell\n"); } colors[(*p)[0]] = c.pixel; } bytes_per_pixel = image->bytes_per_line / width; /* cope with servers having different byte ordering and depths */ for (j = 0; j < height; j++, p++) { unsigned char *r; unsigned long c; q = image->data + image->bytes_per_line * j; r = *p; if (image->byte_order == MSBFirst) { switch (bytes_per_pixel) { case 4: for (i = 0; i < width; i++) { c = colors[*r++]; *q++ = c >> 24; *q++ = c >> 16; *q++ = c >> 8; *q++ = c; } break; case 3: for (i = 0; i < width; i++) { c = colors[*r++]; *q++ = c >> 16; *q++ = c >> 8; *q++ = c; } break; case 2: for (i = 0; i < width; i++) { c = colors[*r++]; *q++ = c >> 8; *q++ = c; } break; case 1: for (i = 0; i < width; i++) *q++ = colors[*r++]; break; } } else { switch (bytes_per_pixel) { case 4: for (i = 0; i < width; i++) { c = colors[*r++]; *q++ = c; *q++ = c >> 8; *q++ = c >> 16; *q++ = c >> 24; } break; case 3: for (i = 0; i < width; i++) { c = colors[*r++]; *q++ = c; *q++ = c >> 8; *q++ = c >> 16; } break; case 2: for (i = 0; i < width; i++) { c = colors[*r++]; *q++ = c; *q++ = c >> 8; } break; case 1: for (i = 0; i < width; i++) *q++ = colors[*r++]; break; } } } XPutImage (display, pixmap, gc, image, 0, 0, 0, 0, width, height); x = (DisplayWidth (display, DefaultScreen (display)) - width) / 2; y = (DisplayHeight (display, DefaultScreen (display)) - height) / 2; xswa.colormap = colormap; xswa.background_pixmap = pixmap; window = XCreateWindow (display, DefaultRootWindow (display), x, y, width, height, 0, depth, InputOutput, visual, CWColormap | CWBackPixmap, &xswa); XSelectInput (display, window, KeyPressMask | ButtonPressMask); XMapRaised (display, window); while (1) { XEvent event; XNextEvent (display, &event); if (event.xany.type == KeyPress || event.xany.type == ButtonPressMask) break; } XUnmapWindow (display, window); XCloseDisplay (display); return 0;} |
You can learn to program X from the documentation in the X
Window System sources--see below. The preceding program is said to be ``written
directly in X-lib'' because it links only with the lowest-level X library,
libX11.so. The advantage of developing
this way is that your program will
work across every variant of UNIX without any modifications. Notice also
that the program deals with any type of display device regardless of its
resolution (width x height or pixels-per-inch), color capacity,
or hardware design.
43.2 Widget Libraries and Desktops
To program in X is tedious. Therefore, most developers will use a higher-level widget library. Most users of GUIs will be familiar with widgets: buttons, menus, text input boxes, and so on. X programmers have to implement these manually. The reason widgets were not built into the X protocol is to allow different user interfaces to be built on top of X. This flexibility makes X the enduring technology that it is.
43.2.1 Background
The X Toolkit (
libXt.so) is a
widget library that has
always come free with X. It is crude-looking by today's standards. It doesn't
feature 3D (shadowed) widgets, although it is comes free with X. [The
excellent
xfig application, an X Toolkit
application, was in
fact used to do the diagrams in this book.]Motif (
libM.so) is a modern, full-featured widget library that had
become an industry standard. Motif is, however, bloated, slow, and
dependent on the X toolkit. It has always been an
expensive proprietary library.
Tk (tee-kay,
libtk.so) is a library that is primarily used with
the Tcl scripting language. It was probably the first
platform-independent library (running on
Windows, all UNIX
variants, and the Apple Mac). It is, however, slow and has
limited features (this is progressively changing). Both Tcl
and Motif are not very elegant-looking.
Around 1996, we saw a lot of widget libraries popping up with different licenses. V, xforms, and graphix come to mind. (This was when I started to write coolwidgets--my own widget library.) There was no efficient, multipurpose, Free, and elegant-looking widget library for UNIX. This was a situation that sucked and was retarding Free software development.
43.2.2 Qt
At about that time, a new GUI library was released. It was called Qt and was developed by Troll Tech. It was not free, but it was an outstanding technical accomplishment in that it worked efficiently and cleanly on many different platforms. It was shunned by some factions of the Free software community because it was written in C++, [Which is not considered to be the standard development language by the Free Software Foundation because it is not completely portable and possibly for other reasons.]and was only free for noncommercial applications to link with.
Nevertheless, advocates of Qt went ahead and began producing the outstanding KDE desktop project--a set of higher-level development libraries, a window manager, and many core applications that together make up the KDE Desktop. The licensing issues with Qt have relaxed somewhat, and it is now available under both the GPL and a proprietary license.
43.2.3 Gtk
At one point, before KDE was substantially complete, Qt
antagonists reasoned that since there were more lines of Qt
code than of KDE code, it would be better to develop a widget
library from scratch--but that is an aside. The Gtk widget library was written
especially for
gimp
(GNU Image Manipulation Program), is GPL'd and
written entirely in C in low-level X calls (i.e., without the X Toolkit),
object oriented, fast, clean, extensible and
having a staggering array of features. It comprises
Glib, a library meant to extend standard C, providing
higher-level functions usually akin only to scripting languages,
like hash tables and lists; Gdk, a wrapper around raw X
Library to give GNU naming conventions to X, and to give a slightly
higher level interface to X; and the Gtk library itself.
Using Gtk, the Gnome project began, analogous to KDE, but written entirely in C.
43.2.4 GNUStep
OpenStep (based on NeXTStep) was a GUI specification published in 1994 by Sun Microsystems and NeXT Computers, meant for building applications. It uses the Objective-C language, which is an object-oriented extension to C, that is arguably more suited to this kind of development than is C++.
OpenStep requires a PostScript display engine that is analogous to the X protocol, but it is considered superior to X because all graphics are independent of the pixel resolution of the screen. In other words, high-resolution screens would improve the picture quality without making the graphics smaller.
The GNUStep project has a working PostScript display engine and is meant as a Free replacement to OpenStep.
43.3 XFree86
X was developed by the X Consortium as a standard as well as
a reference implementation of that standard. There are ports to
every platform that supports graphics. The current version of
the standard is 11 release 6 (hence the directory
/usr/X11R6/). There will probably never be another
version.
XFree86 <http://www.xfree86.org/> is a free port
of X that includes LINUX Intel machines among its supported
hardware. X has some peculiarities that are worth noting if you
are a Windows user, and XFree86 has some over those. XFree86 has
its own versioning system beneath the ``11R6'' as explained below.
43.3.1 Running X and key conventions
(See Section 43.6 for configuring X).
At a terminal prompt, you can type:
|
X |
to start X (provided X is not already running). If you have
configured X properly (including putting
/usr/X11R6/bin in
your
PATH), then this command will initiate the graphics hardware
and a black-and-white stippled background will appear with a single X
as the mouse cursor. Contrary to intuition, this means that X is
actually working properly.
- To kill the X server, use the key combination
 -
- -
- .
.
- To switch to the text console, use
--
 ... --
 .
.
- To switch to the X console, use
-
 . The seven common virtual consoles of
LINUX are 1-6 as text terminals, and 7 as an X terminal
(as explained in Section 2.7).
. The seven common virtual consoles of
LINUX are 1-6 as text terminals, and 7 as an X terminal
(as explained in Section 2.7).
- To zoom in or out of your X session, use
--
 and
--
and
-- .
.
43.3.2 Running X utilities
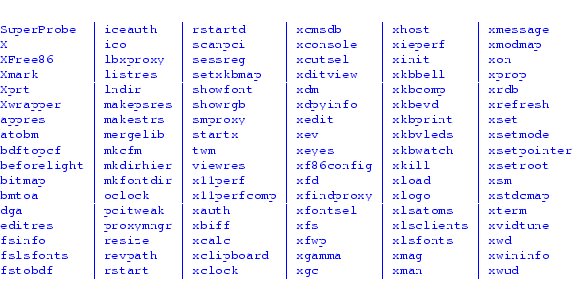
/usr/X11R6/bin/ contains a large number of X utilities
that most other operating systems have based theirs on. Most of
these begin with an
x. The basic XFree86 programs
are:
To run an X program, you need to tell the program what remote
server to connect to. Most programs take the option
-display
to specify the X server. With X running in your seventh
virtual console, type into your first virtual console:
|
xterm -display localhost:0.0 |
localhost refers to the machine on
which the X server is running--in this case, our own. The first
0 means the screen we want to display on (X
supports multiple physical screens in its specification). The
second
0 refers to the root window we want
to display on. Consider a multiheaded [For
example, two adjacent monitors that behave as one continuous
screen.] display: we would like to specify which monitor the
application pops up on.
While
xterm is running, switching to your X session
will reveal a character terminal where you can type commands.
A better way to specify the display is to use the
DISPLAY
environment variable:
|
DISPLAY=localhost:0.0export DISPLAY |
causes all subsequent X applications to display to
localhost:0.0, although a
-display on the
command-line takes first priority.
The X utilities listed above are pretty ugly and unintuitive.
Try, for example,
xclock,
xcalc, and
xedit.
For fun, try
xbill. Also run
|
rpm -qa | grep '^x' |
43.3.3 Running two X sessions
You can start up a second X server on your machine. The command
|
/usr/X11R6/bin/X :1 |
starts up a second X session in the virtual console
8. You can switch to it by using -- or -.
or -.
You can also start up a second X server within your current X display:
|
/usr/X11R6/bin/Xnest :1 & |
A smaller X server that uses a subwindow as a display device will be started. You can easily create a third X server within that, ad infinitum.
To get an application to display to this second server, use, as before,
|
DISPLAY=localhost:1.0export DISPLAYxterm |
or
|
xterm -display localhost:1.0 |
43.3.4 Running a window manager
Manually starting X and then running an application is
not the way to use X. We want a window manager to run
applications properly. The best window manager available (sic) is
icewm, available from
icewm.cjb.net <http://icewm.cjb.net/>. Window managers
enclose each application inside a resizable bounding box and
give you the
![]() ,
,
![]() ,
and
,
and
![]() buttons, as well as possibly a
task bar and a Start button that you may be familiar with. A
window manager is just another X application that has the additional
task of managing the positions of basic X applications on your
desktop. Window managers executables are usually suffixed by a
buttons, as well as possibly a
task bar and a Start button that you may be familiar with. A
window manager is just another X application that has the additional
task of managing the positions of basic X applications on your
desktop. Window managers executables are usually suffixed by a
wm.
If you don't have
icewm, the minimalist's
twm window
manager will almost always be installed.
- Clicking on the background is common convention of X user interfaces. Different mouse buttons may bring up a menu or a list of actions. It is often analogous to a Start button.
An enormous amount of religious attention is given to window managers. There are about 20 useful choices to date. Remember that any beautiful graphics are going to irritate you after you sit in front of the computer for a few hundred hours. You also don't want a window manager that eats too much memory or uses too much space on the screen.
43.3.5 X access control and remote display
The way we described an X server may leave you wondering if
anyone on the Internet can start an application on your display.
By default, X prohibits access from all machines except your
own. The
xhost command enables access from particular machines.
For instance, you can run
xhost +192.168.5.7 to allow
that host to display to your machine. The command
xhost +
completely disables access control. A typical procedure is the
running of an application on a remote machine to a local machine.
A sample session follows:
5 10 15 |
[psheer@divinian]# 192.168.3.2 being added to access control list[psheer@divinian]# inet addr:192.168.3.1 Bcast:192.168.3.255 Mask:255.255.255.0 inet addr:127.0.0.1 Mask:255.0.0.0[psheer@divinian]# Trying 192.168.3.2...Connected to 192.168.3.2.Escape character is '^]'.Debian GNU/Linux 2.2 cericoncericon login: Password: Last login: Fri Jul 13 18:46:43 2001 from divinian on pts/1[psheer@cericon]# [psheer@cericon]# [1] 32573nohup: appending output to 'nohup.out'[psheer@cericon]# Connection closed by foreign host. |
43.3.6 X selections, cutting, and pasting
Start an
xterm to demonstrate the following
mouse operations.
X predates the cut-and-paste conventions of Windows and the Mac.
X requires a three-button mouse,
although pushing the two outer
buttons simultaneously is equivalent to pushing the middle
button. [That is, provided X has been configured for
this--see the
Emulate3Buttons
option in the configuration file example below.] Practice the following:
- Dragging the left mouse button is the common way to select
text. This automatically places the highlighted text into a cut buffer,
also sometimes called the clipboard.
- Dragging the right mouse button extends the selection, that is, enlarges
or reduces the selection.
- Clicking the middle mouse button pastes the selection. Note that X becomes virtually unusable without the capability of pasting in this way.
Modern Gtk and Qt applications have tried to retain compatibility with these mouse conventions.
43.4 The X Distribution
The official X distribution comes as an enormous source
package available in
tgz format at
http://www.xfree86.org/. It is
traditionally packed as three
tgz files to be unpacked
over each other--the total of the three is about 50 megabytes
compressed. This package has nothing really to do with the version
number
X11R6--it is a subset of
X11R6.
Downloading and installing the distribution is a major undertaking, but you should do it if you are interested in X development.
All UNIX distributions come with a compiled and (mostly) configured X installation; hence, the official X distribution should never be needed except by developers.
43.5 X Documentation
The X Window System comes with tens of megabytes of documentation.
43.5.1 Programming
All the books describing all of the programming APIs
are included inside the X distribution. Most of these are of
specialized interest and will not be including in your distribution by
default--download the complete distribution if you want them. You
can then look inside
xc/doc/specs (especially
xc/doc/specs/X11) to begin learning how to program
under X.
Debian also comes with the
xbooks package, and RedHat with the
XFree86-doc packages.
43.5.2 Configuration documentation
Important to configuring X is the directory
/usr/X11R6/lib/X11/doc/ or
/usr/share/doc/xserver-common/. It may
contain, for example,
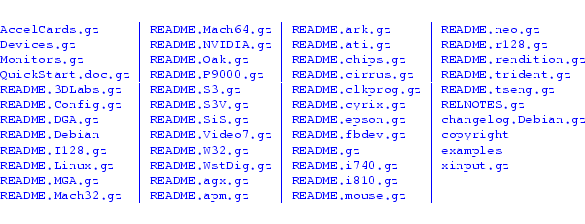
As you can see, there is documentation for each type of graphics card.
Learning how to configure X is a simple matter of reading the
QuickStart guide and then checking the specifics for your card.
43.5.3 XFree86 web site
Any missing documentation can be found on the
XFree86 <http://www.xfree86.org/> web site.
New graphics cards are coming out all the time.
XFree86 <http://www.xfree86.org/> contains FAQs about
cards and the latest binaries, should you not be able to get your card
working from the information below. Please always search the XFree86
web site for information on your card and for
newer X releases before reporting a problem.
43.6 X Configuration
Configuring X involves editing XFree86's configuration file
/etc/X11/XF86Config. Such a file may have been produced at
installation time but will not always be correct. You will hence
frequently find yourself having to make manual changes to get X
running in full resolution.
Note that XFree86 has a slightly different configuration file format for the new version 4. Differences are explained below.
43.6.1 Simple 16-color X server
The documentation discussed above is a lot to read. The simplest possible way to get
X working is to determine what mouse you have, and then create a file,
/etc/X11/XF86Config (back up your original) containing the following.
Adjust the
"Pointer" section for your correct
Device and
Protocol. If you
are running X version 3.3, you should also comment out the
Driver "vga"
line. You may also have to switch the line containing
25.175 to
28.32
for some laptop displays.
5 10 15 20 25 30 35 40 45 50 |
Section "Files" RgbPath "/usr/X11R6/lib/X11/rgb" FontPath "/usr/X11R6/lib/X11/fonts/misc/"EndSectionSection "ServerFlags"EndSectionSection "Keyboard" Protocol "Standard" AutoRepeat 500 5 XkbDisable XkbKeymap "xfree86(us)"EndSectionSection "Pointer"# Protocol "Busmouse"# Protocol "IntelliMouse"# Protocol "Logitech" Protocol "Microsoft"# Protocol "MMHitTab"# Protocol "MMSeries"# Protocol "MouseMan"# Protocol "MouseSystems"# Protocol "PS/2" Device "/dev/ttyS0"# Device "/dev/psaux" Emulate3Buttons Emulate3Timeout 150EndSectionSection "Monitor" Identifier "My Monitor" VendorName "Unknown" ModelName "Unknown" HorizSync 31.5 - 57.0 VertRefresh 50-90# Modeline "640x480" 28.32 640 664 760 800 480 491 493 525 Modeline "640x480" 25.175 640 664 760 800 480 491 493 525EndSectionSection "Device" Identifier "Generic VGA" VendorName "Unknown" BoardName "Unknown" Chipset "generic"# Driver "vga" Driver "vga"EndSectionSection "Screen" Driver "vga16" Device "Generic VGA" Monitor "My Monitor" Subsection "Display" Depth 4 Modes "640x480" Virtual 640 480 EndSubsectionEndSection |
You can then start X. For XFree86 version 3.3, run
|
/usr/X11R6/bin/XF86_VGA16 -cc 0 |
or for XFree86 version 4, run
|
/usr/X11R6/bin/XFree86 -cc 0 |
Both of these will print out a status line containing
clocks: ...
confirming
whether your choice of
25.175
was correct. [This is the speed, in Megahertz, that pixels can come
from your card and is the only variable to configuring a 16-color display.]
You should now have a working gray-level display that is actually almost usable. It has the advantage that it always works.
43.6.2 Plug-and-Play operation
XFree86 version 4 has ``Plug-and-Play'' support. Simply run
|
/usr/X11R6/bin/XFree86 -configure |
to produce a working
XF86Config file.
You can copy this file to
/etc/X11/XF86Config and immediately
start running X. However, the file you get may be less than optimal.
Read on for detailed configuration.
43.6.3 Proper X configuration
A simple and reliable way to get X working is given by the following steps
(if this fails, then you will have to read some of the documentation described
above). There is also a tool called
Xconfigurator
which provides a user-friendly graphical front-end.
- 1.
- Back up your
/etc/X11/XF86Configto/etc/X11/XF86Config.ORIG. - 2.
- Run
SuperProbeat the character console. It will blank your screen and then spit out what graphics card you have. Leave that information on your screen and switch to a different virtual terminal. IfSuperProbefails to recognize your card, it usually means that XFree86 will also fail. - 3.
- Run
xf86config. This is the official X configuration script. Run through all the options, being very sure not to guess. You can set your monitor to31.5, 35.15, 35.5; Super VGA...SuperProbeoutput), and check which X server the program recommends--this will be one ofXF86_SVGA,XF86_S3,XF86_S3V, etc. Whether you ``set the symbolic link'' or not, or ``modify the /etc/X11/Xserver file'' is irrelevant. Note that you do not need a ``RAM DAC'' setting with most modern PCI graphics cards. The same goes for the ``Clockchip setting.'' - 4.
- Do not run X at this point.
- 5.
- The
xf86configcommand should have given you an example/etc/X11/XF86Configfile to work with. You need not run it again. You will notice that the file is divided into sections, like
5 |
Section "<section-name>" <config-line> <config-line> <config-line>EndSection |
- Search for the
"Monitor"section. A little further down you will see lots of lines like:
5 |
# 640x480 @ 60 Hz, 31.5 kHz hsyncModeline "640x480" 25.175 640 664 760 800 480 491 493 525# 800x600 @ 56 Hz, 35.15 kHz hsyncModeLine "800x600" 36 800 824 896 1024 600 601 603 625# 1024x768 @ 87 Hz interlaced, 35.5 kHz hsyncModeline "1024x768" 44.9 1024 1048 1208 1264 768 776 784 817 Interlace |
- These are timing settings for different monitors and
screen resolutions. Choosing one that is too fast could blow an old
monitor but will usually give you a lot of garbled fuzz on your
screen. We are going to eliminate all but the three above; we do that
by commenting them out with
#or deleting the lines entirely. (You may want to back up the file first.) You could leave it up to X to choose the correctModelineto match the capabilities of the monitor, but this doesn't always work. I always like to explicitly choose a selection ofModelines.If you don't find modelines in your
XF86Configyou can use this as your monitor section:
5 10 |
Section "Monitor" Identifier "My Monitor" VendorName "Unknown" ModelName "Unknown" HorizSync 30-40 VertRefresh 50-90 Modeline "320x200" 12.588 320 336 384 400 200 204 205 225 Doublescan ModeLine "400x300" 18 400 416 448 512 300 301 302 312 Doublescan Modeline "512x384" 20.160 512 528 592 640 384 385 388 404 -HSync -VSync Modeline "640x480" 25.175 640 664 760 800 480 491 493 525 ModeLine "800x600" 36 800 824 896 1024 600 601 603 625 Modeline "1024x768" 44.9 1024 1048 1208 1264 768 776 784 817 InterlaceEndSection |
- 6.
- Edit your
"Device"section. You can make it as follows for XFree86 version 3.3, and there should be only one"Device"section.
5 |
Section "Device" Identifier "My Video Card" VendorName "Unknown" BoardName "Unknown" VideoRam 4096EndSection |
- For XFree86 version 4, you must add the device
driver module. On my laptop, this is
ati:
5 |
Section "Device" Identifier "My Video Card" Driver "ati" VendorName "Unknown" BoardName "Unknown" VideoRam 4096EndSection |
- Several options that can also be added to the
"Device"section to tune your card. Three possible lines are
|
Option "no_accel" Option "sw_cursor" Option "no_pixmap_cache" |
- which disable graphics hardware acceleration, hardware cursor support, and video memory pixmap caching, respectively. The last refers to the use of the card's unused memory for intermediate operations. You should try these options if there are glitches or artifacts in your display.
- 7.
- Your
"Screen"section should properly order the modes specified in the"Monitor"section. It should use your single"Device"section and single"Monitor"section,"My Video Card"and"My Monitor", respectively. Note that XFree86 version 3.3 does not take aDefaultDepthoption.
5 10 15 20 25 |
Section "Screen" Identifier "My Screen" Device "My Video Card" Monitor "My Monitor" DefaultDepth 16 Subsection "Display" ViewPort 0 0 Virtual 1024 768 Depth 16 Modes "1024x768" "800x600" "640x480" "512x384" "400x300" "320x240" EndSubsection Subsection "Display" ViewPort 0 0 Virtual 1024 768 Depth 24 Modes "1024x768" "800x600" "640x480" "512x384" "400x300" "320x240" EndSubsection Subsection "Display" ViewPort 0 0 Virtual 1024 768 Depth 8 Modes "1024x768" "800x600" "640x480" "512x384" "400x300" "320x240" EndSubsectionEndSection |
- 8.
- At this point you need to run the X program itself. For
XFree86 version 3.3, there will be a separate package for each
video card, as well as a separate binary with the appropriate
driver code statically compiled into it. These binaries are
of the form
/usr/X11R6/bin/XF86_cardname. The relevant packages can be found with the commanddpkg -l 'xserver-*'for Debian, andrpm -qa | grep XFree86for RedHat 6 (orRedHat/RPMS/XFree86-*on your CD-ROM). You can then run
|
/usr/X11R6/bin/XFree86-<card> -bpp 16 |
- which also sets the display depth to 16, that is, the number of
bitsperpixel, which translates to the number of colors.For XFree86 version 4, card support is compiled as separate modules named
/usr/X11R6/lib/modules/drivers/cardname_drv.o. A single binary executable/usr/X11R6/bin/XFree86loads the appropriate module based on theDriver "cardname"line in the"Device"section. Having added this, you can run
|
/usr/X11R6/bin/XFree86 |
- where the depth is set from the
DefaultDepth 16line in the"Screen"section. You can find what driver to use bygreping the modules with the name of your graphics card. This is similar to what we did with kernel modules on page![[*]](crossref.png) .
.
- 9.
- A good idea is to now create a script,
/etc/X11/X.sh, containing your-bppoption with the server you would like to run. For example,
|
#!/bin/shexec /usr/X11R6/bin/<server> -bpp 16 |
- 10.
- You can then symlink
/usr/X11R6/bin/Xto this script. It is also worth symlinking/etc/X11/Xto this script since some configurations look for it there. There should now be no chance that X could be started except in the way you want. Double-check by runningXon the command-line by itself.
43.7 Visuals
X introduces the concept of a visual. A visual is the hardware method used to represent colors on your screen. There are two common and four specialized types:
- TrueColor(4)
- The most obvious way of representing a color is to
use a byte for each of the red, green, and blue values that a pixel is
composed of. Your video buffer will hence have 3 bytes per pixel, or 24 bits.
You will need 800 x 600 x 3 = 1440000 bytes to represent a typical
800 by 600 display.
Another way is to use two bytes, with 5 bits for red, 6 for green, and then 5 for blue. This gives you 32 shades of red and blue, and 64 shades of green (green should have more levels because it has the most influence over the pixel's overall brightness).
Displays that use 4 bytes usually discard the last byte, and are essentially 24-bit displays. Note also that most displays using a full 8 bits per color discard the trailing bits, so there is often no appreciable difference between a 16-bit display and a 32-bit display. If you have limited memory, 16 bits is preferable; it is also faster.
- PseudoColor(3)
- If you want to display each pixel with only one byte and still get a wide range of colors, the best way is to make that pixel index a dynamic table of 24-bit palette values: 256 of them exactly. 8-bit depths work this way. You will have just as many possible colors, but applications will have to pick what colors they want to display at once and compete for entries in the color palette.
- StaticGray(0)
- These are gray-level displays usually with 1 byte or 4 bits per pixel, or monochrome displays with 1 byte per pixel, like the legacy Hercules Graphics Card (HGC, or MDA--monochrome graphics adapter). Legacy VGA cards can be set to 640 x 480 in 16-color ``black and white.'' X is almost usable in this mode and has the advantage that it always works, regardless of what hardware you have.
- StaticColor(2)
- This usually refers to 4-bit displays like the old (and obsolete) CGA and EGA displays having a small fixed number of colors.
- DirectColor(5)
- This is rarely used and refers to displays that have a separate palette for each of red, green, and blue.
- GrayScale(1)
- These are like StaticGray, but the gray levels are programmable like PseudoColor. This is also rarely used.
You can check the visuals that your display supports with the
xdpyinfo
command. You will notice more than one visual listed, since X can
effectively support a simple StaticColor visual with PseudoColor, or
a DirectColor visual with TrueColor.
The default visual is listed first
and can be set with the
-cc option as we did above for
the 16-color server. The argument to the
-cc option is the
number code above in parentheses.
Note that good X applications check the list of available visuals
and choose an appropriate one. There are also those that require a
particular visual, and some that take a
-visual option on the
command-line.
43.8 The
startx and
xinit Commands
The action of starting an X server, then a window manager
should obviously be automated. The classic way to start
X is to run the
xinit command on its own. On LINUX
this has been superseded by
|
startx |
which is a script that runs
xinit after setting some
environment variables. These commands indirectly call a number of
configuration scripts in
/etc/X11/xinit/ and your home directory, where you
can specify your window manager and startup applications. See
xinit(1)
and
startx(1) for more information.
43.9 Login Screen
init runs
mgetty, which
displays a
login: prompt on every attached
character terminal.
init can also run
xdm, which displays a
graphical login box
on every X server. Usually, there will only
be one X server: the one on your own machine.
The interesting lines inside your
inittab file are
|
id:5:initdefault: |
and
|
x:5:respawn:/usr/X11R6/bin/xdm -nodaemon |
which state that the default run level is
5 and
that
xdm should be started at run level
5. This
should only be attempted if you are sure that X works (by running
X on the command-line by itself). If it
doesn't, then
xdm will keep trying to start X,
effectively disabling the console. On systems besides RedHat and
Debian, these may be run levels 2 versus 3, where run level 5 is
reserved for something else. In any event, there should be
comments in your
/etc/inittab file to explain your
distribution's convention.
43.10 X Font Naming Conventions
Most X applications take a
-fn or
-font option
to specify the font. In this section, I give a partial guide
to X font naming.
A font name is a list of words and numbers separated by hyphens. A typical font
name is
-adobe-courier-medium-r-normal--12-120-75-75-m-60-iso8859-1.
Use the
xlsfonts command to obtain a complete list of fonts.
The font name fields have the following meanings:
adobe- The name of the font's maker. Others are

courier- The font family. This
is the real name of the font. Some others are
medium- The font weight: it can also be
bold,demibold, orregular. r- Indicate that the font is
roman;iis for italic andois for oblique. normal- Character width and intercharacter spacing. It can
also be
condensed,semicondensed,narrow, ordouble. 12- The pixel size. A zero means a scalable font that can be selected at any pixel size. The largest fixed sized font is about 40 points.
120- The size in tenths of a printers point. This is usually 10 times the pixel size.
75-75- Horizontal and vertical pixel resolution for which
the font was designed. Most monitors today are 75 pixels per inch. The
only other possible values are
72-72or100-100. m- The font spacing. Other values are
monospaced,proportional, orcondensed. 60- The average width of all characters in the font in tenths of a pixel.
iso8859-1- The ISO character set. In this case, the
1indicates ISO Latin 1, a superset of the ASCII character set. This last bit is the locale setting, which you would normally omit to allow X to determine it according to your locale settings.
As an example, start
cooledit with
|
cooledit -font '-*-times-medium-r-*--20-*-*-*-p-*-iso8859-1'cooledit -font '-*-times-medium-r-*--20-*-*-*-p-*'cooledit -font '-*-helvetica-bold-r-*--14-*-*-*-p-*-iso8859-1'cooledit -font '-*-helvetica-bold-r-*--14-*-*-*-p-*' |
These invoke a newspaper font and an easy-reading font
respectively. A
* means that the X server can place
default values into those fields. That way, you do not have to
specify a font exactly.
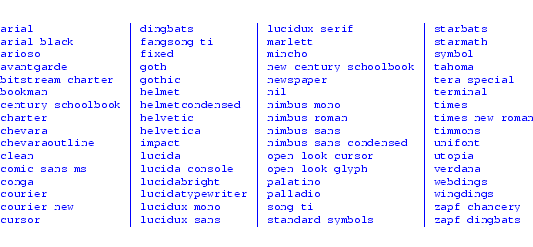
The
xfontsel command is the traditional X utility for
displaying fonts and the
showfont command dumps fonts as
ASCII text.
43.11 Font Configuration
Fonts used by X are conventionally stored in
/usr/X11R6/lib/X11/fonts/. Each directory contains a
fonts.alias file that maps full font names to simpler names,
and a
fonts.alias file which lists the fonts contained in that
directory. To create these files, you must
cd to each directory
and run
mkfontdir as follows:
|
mkfontdir -e /usr/X11R6/lib/X11/fonts/encodings -e /usr/X11R6/lib/X11/fonts/encodings/large |
You can rerun this command at any time for good measure.
To tell X to use these directories add the following lines to your
"Files" section. A typical configuration will contain
5 |
Section "Files" RgbPath "/usr/X11R6/lib/X11/rgb" FontPath "/usr/X11R6/lib/X11/fonts/misc/:unscaled" FontPath "/usr/X11R6/lib/X11/fonts/75dpi/:unscaled" FontPath "/usr/X11R6/lib/X11/fonts/Speedo/" FontPath "/usr/X11R6/lib/X11/fonts/Type1/" FontPath "/usr/X11R6/lib/X11/fonts/misc/" FontPath "/usr/X11R6/lib/X11/fonts/75dpi/"EndSection |
Often you will add a directory without wanting to restart X. The command to add a directory to the X font path is:
|
xset +fp /usr/X11R6/lib/X11/fonts/<new-directory> |
and to remove a directory, use
|
xset -fp /usr/X11R6/lib/X11/fonts/<new-directory> |
To set the font path, use
|
xset fp= /usr/X11R6/lib/X11/fonts/misc,/usr/X11R6/lib/X11/fonts/75dpi |
and reset it with
|
xset fp default |
If you change anything in your font directories, you should run
|
xset fp rehash |
to cause X to reread the font directories.
The command
chkfontpath prints out your current font
path setting.
Note that XFree86 version 4 has a TrueType engine. TrueType
(
.ttf) fonts are common to Windows. They are high-quality,
scalable fonts designed for graphical displays. You can add your
TrueType directory alongside your other directories above, and run
|
ttmkfdir > fonts.scalemkfontdir -e /usr/X11R6/lib/X11/fonts/encodings -e /usr/X11R6/lib/X11/fonts/encodings/large |
inside each one. Note that the
ttmkfdir is needed to
catalog TrueType fonts as scalable fonts.
43.12 The Font Server
Having all fonts stored on all machines is expensive.
Ideally, you would like a large font database installed on
one machine and fonts to be read off this machine, over the
network and on demand. You may also have an X that does not
support a particular font type; if it can read the font from
the network, built-in support will not be necessary.
The daemon
xfs (X font server)
facilitates all of this.
xfs reads its own simple configuration file from
/etc/X11/fs/config
or
/etc/X11/xfs/config. It might contain a similar list of
directories:
5 10 |
client-limit = 10clone-self = oncatalogue = /usr/X11R6/lib/X11/fonts/misc:unscaled, /usr/X11R6/lib/X11/fonts/75dpi:unscaled, /usr/X11R6/lib/X11/fonts/ttf, /usr/X11R6/lib/X11/fonts/Speedo, /usr/X11R6/lib/X11/fonts/Type1, /usr/X11R6/lib/X11/fonts/misc, /usr/X11R6/lib/X11/fonts/75dpidefault-point-size = 120default-resolutions = 75,75,100,100deferglyphs = 16use-syslog = onno-listen = tcp |
You can start the font server by using:
|
/etc/init.d/xfs start( /etc/rc.d/init.d/xfs start ) |
and change your font paths in
/etc/X11/XF86Config to
include only a minimal set of fonts:
5 |
Section "Files" RgbPath "/usr/X11R6/lib/X11/rgb" FontPath "/usr/X11R6/lib/X11/fonts/misc/:unscaled" FontPath "unix/:7100"EndSection |
Or otherwise use
xset:
|
xset +fp unix/:7100 |
Note that no other machines can use your own font server
because of the
no-listen = tcp option. Deleting this
line (and restarting
xfs) allows you to instead use
|
FontPath "inet/127.0.0.1:7100" |
which implies an open TCP connection to your
font server, along with all its security implications.
Remote machines can use the same setting after changing
127.0.0.1 to your IP address.
Finally, note that for XFree86 version 3.3, which does not
have TrueType support, the font server name
xfstt is
available on Fresh Meat <http://freshmeat.net/>.
Next: 44. UNIX Security Up: rute Previous: 42. The LINUX Kernel Contents